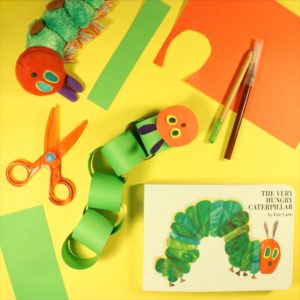
How to make Very Hungry Caterpillar paper chains
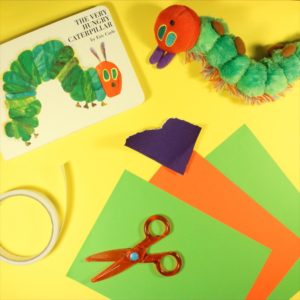
A perfect cutting-and-sticking activity for Very Hungry Caterpillar fans, these paper chains will brighten up a rainy day! You could even use them to decorate for a Very Hungry party…
You will need:
• A piece of green paper or thin card
• A piece of red paper or thin card
• A piece of yellow paper or thin card (although this isn’t 100% necessary)
• A purple felt-tip pen
• A pencil
• A ruler
• Some scissors (grown-up use only)
• Some double-sided tape
• Some blu-tack or glue
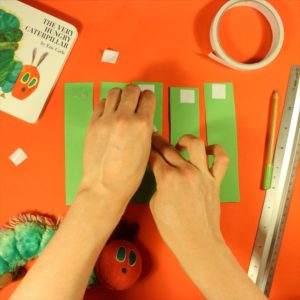
Step 1. Divide your piece of A4 green paper into 6 even-size strips using your ruler and pencil. Then carefully cut the strips out using your scissors.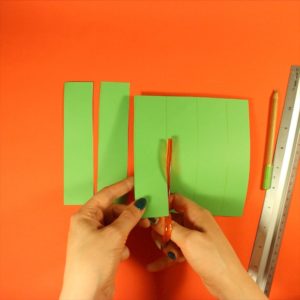
Step 2. Add a small piece of double-sided tape to the top of each green strip and peel off the tape-cover so that the sticky bit is exposed!
Step 3. Bend the first green strip into a circle and stick it in place using the double-sided tape. You will now have one green card circle.
Step 4. Now, take the second green strip and loop it through the first circle. Bend this second strip into a circle and stick in place using the double-sided tape. This is the start of your chain!
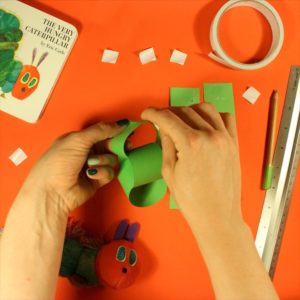
Step 5. Repeat with each strip of card until you have a green paper chain.
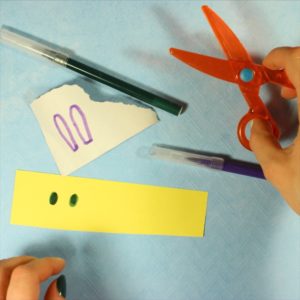
Step 6. Now it’s time to make your caterpillar’s face. Cut out some yellow ovals for the eyes and use a felt-tip or pencil to draw some pupils inside the eyes.
Step 7. Cut a circle out of the red paper or card. This will be your caterpillar’s face! Using blu-tack, stick the eyes onto the face, and use your felt-tip to draw the caterpillar’s nose. 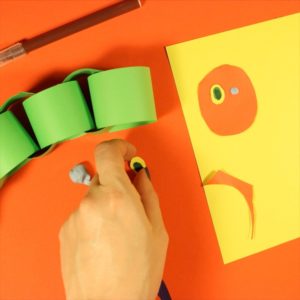
Step 8. Using a purple felt-tip, draw and colour in some antennae and cut around those too. Attach them to your caterpillar’s face with the blu-tack.
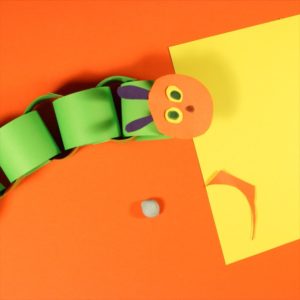
Step 9. Finally, use the blu-tack to attach your caterpillar’s face to the front of the paper chain to transform it into the Very Hungry Caterpillar!
Step 10. Give your caterpillar a name and display him with pride in your home!
Paint your own Very Hungry Caterpillar
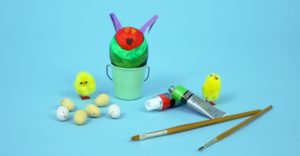 Crawl into spring with this Very Hungry Caterpillar-inspired egg painting tutorial. Little egg munchers will just love getting their hands messy with this fun craft, inspired by the classic Eric Carle story.
You will need:
• An egg
• Acrylic or poster paints
• A paintbrush
• Some card or thick paper
• Some glue
• Scissors
How to make:
1. Place your egg in a pan of water, and boil until hard, for around about ten minutes. Remove from the water and leave to cool, until cold to touch. (note: little ones should always do this with the help of a grown-up!)
2. Using different mixes of green, paint your egg in bright, caterpillar-like stripes. Once it’s dry, add some red for the face, and then leave to dry again
3. Using some yellow paint, add the features to your caterpillar’s face
4. Cut out some long, caterpillar-like antennae from your card or thick paper, and then paint them purple and leave to dry
5. Using glue, gently add the antenna to the top of the caterpillar’s head. Careful now, you wouldn’t want him to break!
Now your Very Hungry Caterpillar Easter egg is complete. Why not take him egg rolling, and see if you can spot some beautiful butterflies!
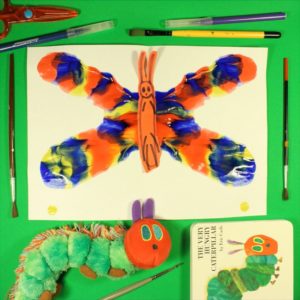
 Make a Very Hungry Caterpillar inspired butterfly painting
Inspired by the moment when Eric Carle’s Very Hungry Caterpillar transforms into a beautiful butterfly, this simple craft will delight toddlers and help them learn about colours, patterns and symmetry.
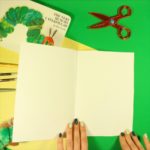
You will need:
• A piece of green paper or thin card
• A piece of A4 white paper or thin card
• Some colourful poster paints – whichever colours you would like!
• A pencil
• Some coloured card (any colour you would like)
• Some scissors
• Some glue
• A felt-tip pen of any colour
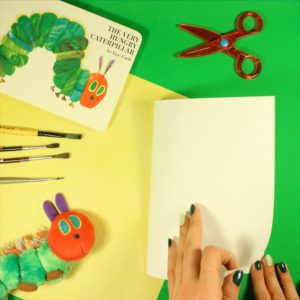
Step 2. Unfold the paper again – now you can see a fold line which will be the middle of your butterfly!

Step 3. Using a pencil, draw a big triangle from the top right-hand corner of your page to the bottom right-hand corner of your page and across to the very middle point of your page. It doesn’t need to be neat, this will just be a guideline. Then, take some poster paints (any colours you like). On the right-hand side of your paper, fill your triangle with rough splodges of colour. These can be anywhere inside your triangle and in any formation you like – let your creativity run wild!
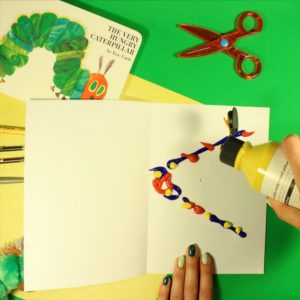
Step 4. When you’ve finished liberally splodging paint onto the right half of your paper, fold the left half on top of the right half along your fold line and gently press together.
Step 5. Carefully peel the two halves of your paper apart and…
Step 6. Voila! You have some beautiful butterfly wings! Leave them aside to dry for 20 minutes or until the paint is dry to the touch.
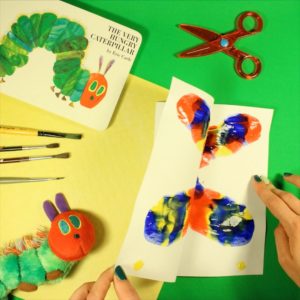
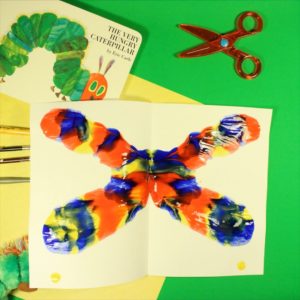
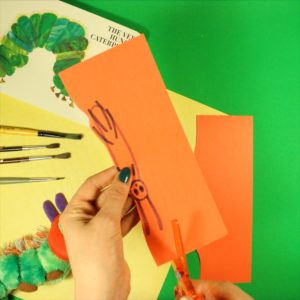
Step 7. Take your piece of coloured card and, with a pencil or your felt-tip pin, draw a long, thin sausage shape onto the card. This will be the body of your butterfly. Make sure you add some antennae and a smiley face!
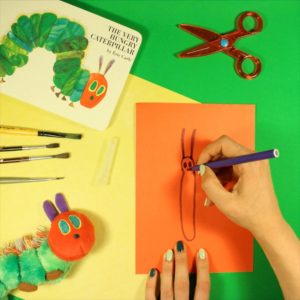
Step 8. Carefully cut around your butterfly’s body.
Step 9. Once your butterfly wings have dried, glue the body right in the middle of your paper to complete your colourful butterfly. You might like to choose a name for your completed butterfly, too!